
Hello all!
As promised, here is a quick tutorial (and freebie!) on how I created the Lazy Susan shown here. And thanks to all who voted and shared the link!
So, let's get to it!

First, I found this plain, old lazy susan on one of our {many} thrift shopping expeditions. I pretty much knew instantly what I wanted to do with.

1. I did a light sand and then primed and painted it white. The center in this photo was a test to see if I wanted to paint it yellow...I eventually chose purple.
2.I painted the outer edge a bright red, knowing that I would want it to look "Seuss-y". I just used some acrylic paint I had lying around, because I knew I would be covering it with a protective finish. If I weren't doing the final step, I would have used a latex.
3. After I painted the center purple, I was left with a smudgy line, so I covered up all messes with more white paint
4. I applied the polka dots with a round sponge paintbrush
5. I let some of the circles go over the edge, and even made some oblong, so they weren't too perfect.
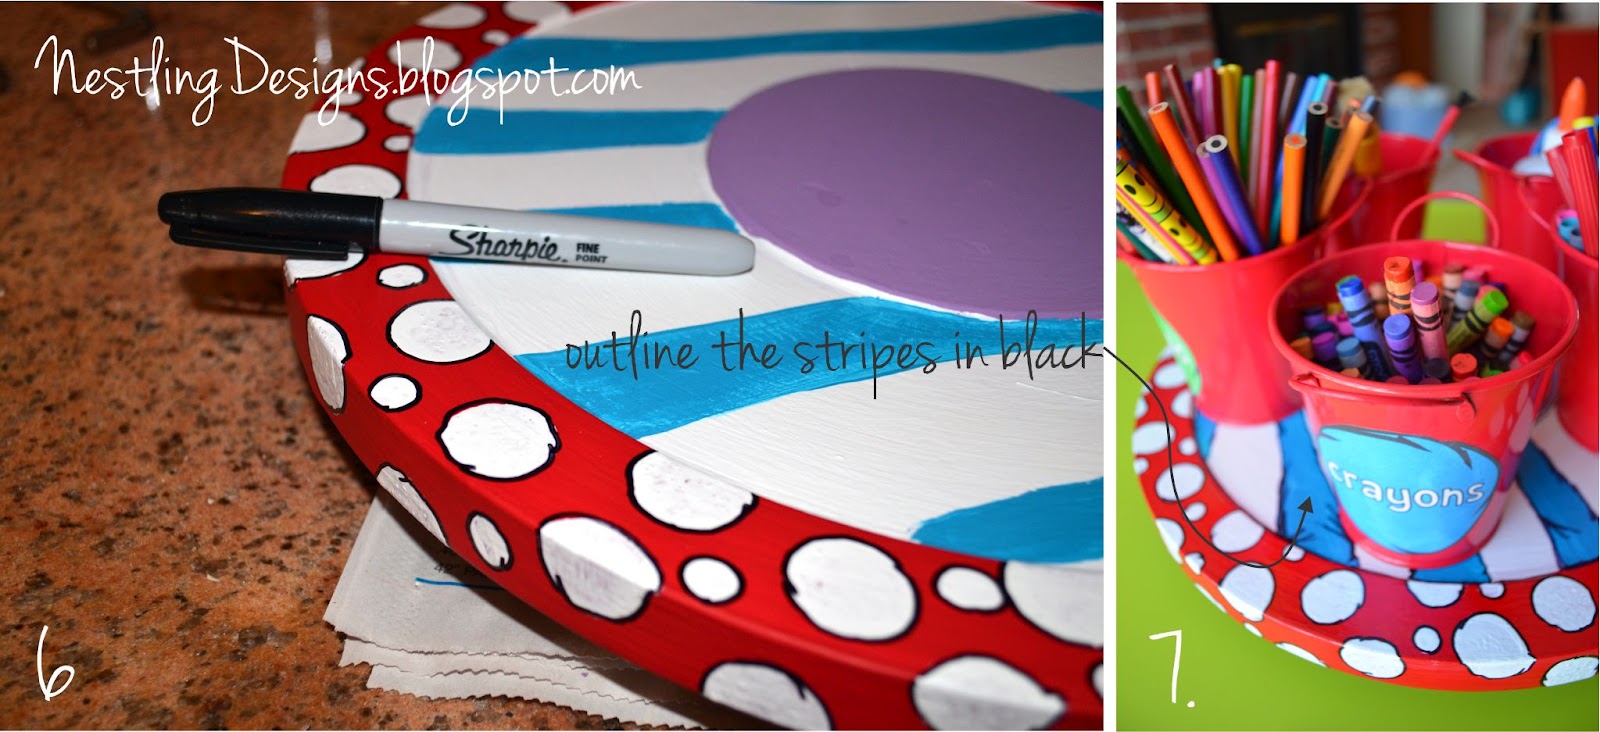
6. I outlined all my circles (making sure not to be perfect!) and painted wavy lines in blue
7. I outlined the lines in the same sharpie marker I did the dots. Outlining is essential! It is really what makes all the details pop and look more cartoonish.
The red pails were dollar finds from Target. (In fact, I stumbled across them when they were on clearance for only 40cents!!)
I created the labels myself and attached them with glue (although they could have been printed with sticker paper also) and then did a protective coating of ModPodge over them to protect them from all the drawing I knew they would endure from my kids :)


It's definitly something we use EVERY day.
And for Freebie Friday, you can print up some labels to make your OWN art holders!

Just click HERE to get your own!
Happy creating!
xo,
Rachel
No comments:
Post a Comment