Monday, November 26, 2012

Construction Truck Party :: Plan of Action

Hello :)
 
We have been busy cyber monday-ing our little hearts out over here and I am just starting to settle back into a routine after our long holiday.
 
We finally began putting up our Christmas decorations, much to the cat's delight!
 
 
Aside from decorating, we have such a crazy-busy week ahead. It is game time for our construction truck party for our little guy, since the big day is (eek!) this weekend! I have been getting all the details together and DIY-ing my little heart out.
 
Awhile back I did a quick sketch of our party plan of action.

 
This is just when I sketch out some ideas and come up with a basic plan on how I would like the party to look. Often things change as it comes time to actually by things and start putting things together.

 
Having it all out on paper tends to help me plan what I need to make and buy.

 
As far as designing the party is concerned, I typically start with the invitation. From there I tend to build on that design. The invites have been out for awhile now...want to sneak a peak??


I considered doing a box invitation with this but decided to just do a detail on the envelope instead:


I am so excited to put this party together!!
 
Follow me on instagram: nestling_designs for pics to see more sneak peaks as the week goes on!
 
 
Hope your week started off wonderful as well :)
 
 
xo,
Rachel


Tuesday, November 20, 2012

Pinterest to Done! :: Chalkboard Daily Calendar

I am so excited to share with you the finished product of this project that I showed a sneak peak of this weekend!
 
This project has been one that I have slowly been working on here and there for about a month now. It all started with this amazing pin that a pinned over a year ago:
 
Pinned Image
 
First things first: it had me at chalkboard.
 
Next, I loved the idea of using smaller squares for an entire week worth of planning.
 
Loved it, pinned it, and well....forgot about it :)
Lately, however, the kids have had so much going on (dr's appt's, practices, homework due, etc) that I really wanted to start writing all their stuff down in its own place. And that is where this came in!
 
We happened to have some cheap wood laying around from some of the misc projects we did in our family room, and even had some of the left over chalkboard paint as well. Since the project was practically free, there was really no reason NOT to do it, right??
 
 
1. First we cut out wood down to 6" squares.
2. Jason used our router along the edges to really make this piece look nice.
3. He drilled a hole in the back (center!) so that we could mount this flush against the wall.

 
Since we were using the cheap stuff on this project, he had to use wood putty to fill in some of the spaces.
 
Next, I primed it. When painting things like this, I like to prop it up underneath with something smaller so that the paint doesn't dry to the paper.

 
A few coats of black chalkboard later, we were looking good! The original pin used wooden letters for the days {which I really wanted to do!}, but I couldn't find any in a font that I liked at the craft store, so I chose some nice scrapbook letters instead.

 
I also purchased clips because I was obsessed with this pin:
Pinned Image
 
I loved, loved, loved the idea of being able to just clip the invite right to the day it was going on. With three kids, we get a ton of birthday invitations, which usually clutters up our kitchen command center. Jason and I both agreed that the pin board would probably end up too messy, so we stuck with my original plan of the chalkboards; the clips were a compromise.
 
 
To add the clips, I measured the center of the top and marked it with a pencil. I just hot glued them on next.

 
And then they were done!


The boards are hung next to the kid's art display boards {which don't be surprised if you see a redo of that coming up!}:

 
The clips are small, so they don't take too much away from the chalkboard, but are surprisingly really strong.


Since the tiles only cover a week worth of stuff, I added a folder to the bins in the kitchen:

 
I toss all the time sensitive stuff in there and pull it out at the beginning of each week.

 
Oh, pinterest, where would I be with out you???


xo,
Rachel


Monday, November 19, 2012

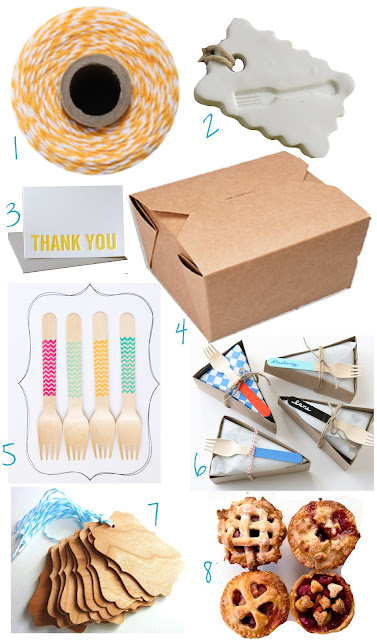
Thanksgiving Leftovers TO GO

I'm not gonna lie.
 
Thanksgiving dinner has always been super easy for me. Because I don't do the cooking :). I'm lucky enough to have a guy that not only does the cooking, but actually wants to! All I am in charge of is making things look pretty {which, let's face it :: to me, that's just about as important as the meal itself, ha!}
 
For me, the best thing about this holiday are the leftovers, am I right?
 
So today I wanted to share some easy ways to send your guests home, not just with a box of leftovers, but a little bit of style, too :)


xo,
Rachel


Sunday, November 18, 2012

Mod Monkey Party

Without a doubt, our little man's party last year is a major contender for one of my all time faves! We knew we wanted to do a monkey themed party since we called our little guy 'monkey' all the time.
 
 
The theme really came together while I was making the invitations. I just kept thinking of a this fun & modern twist on the whole "see no, hear no, speak no" monkeys. Throw in a little Warhol and we had ourselves a party!


Peanut butter and jelly sandwiches were served on {on what else?} Banana Bread.
{PS. this was delicious!}


Since this was just a small party for a few close friends, activities included some cute games, like this bean bag toss I made.
 
 {and yes, the top guy looks a little angry. This is why I like to stick to digital work, ha!}


This whole printable party is available on my Etsy Shop,  including the cupcake wrappers & toppers not featured in the party above:

 
You can buy the entire party package and the invitations in my Etsy shop!


Happy Monday :)
xo,
Rachel