Tuesday, June 26, 2012

New to the Shop :: Care Bear Invitations

I have gotten a few emails lately about the Care Bear party I threw HERE. It made me realize two things:

I really need to create a link to my Etsy Shop. 
I never showed you guys the invitation that I created for the party.

Although the title says "new to shop", I actually put the Care Bear Party Package on the shop about a month or so ago. So far it's been the most popular item! (of course, there are only two items so far...ha!) I truly love the excitement that clients have when they see their proofs for the first time.... it's my favorite part of the whole thing!

Here is a peak at the invitation that I placed on my shop to go with the party package:


The invitation I used for our party was basically the same as the one above, except it was double sided. The rsvp cloud was blank on the front and information was on the back with a photo I took of Cayden. The back looked like this:


I opted not to put that option on Etsy, since I figured it might be too complicated for some people to do double side printing on their own. Another option I custom created for a client was a photo invitation which I will be adding to the shop this weekend:


Also in the shop are the goody bags I made.

Want a sneak peak at one of the parties I'm going to be sharing soon??
Check out my ETSY SHOP to see the Mod Monkey I threw this winter.


Hope everyone is having a lovely week!


xo,
Rachel

Monday, June 25, 2012

Moroccan Inspiration :: Children's Room

Here's a little inspiration this Tuesday for a morrocan kid's room


one / three / four / five / six / seven
{I got this pic from pinterest, but couldn't find a link}

The aqua and purple color palett creates a modern feel, while a punch of yellow really makes it pop.


xo,
Rachel

Strawberry Fields


Yesterday we got to cross off another item on our Summer list: picking our own food.


Jason found a local farm that still had strawberries, so off we went.


Don't the berries look amazing??


And of course, strawberry shortcake was a must :)


We used a recipe that we found here.  

Delicious!!

Today we are getting some stuff done around the house (this past week, I have basically made Jason rearrange our entire house lol) and maybe going to the beach. Hope everyone else is enjoying their Monday!!


xo,
Rachel

Saturday, June 23, 2012

Your Weekend


Another weekend; another party!

I love using kraft paper for wrapping. Usually I try to decorate it somehow, but I appreciate the beauty of it just by itself. I think some people might hate the creases you have in reusing this type of paper, but I love the organic feel it brings.


Since Jason works in hospitality, he always has an eclectic schedule. So technically, our weekend starts tomorrow :)

Hope everyone is having a great weekend!


xo,
Rachel


Thursday, June 21, 2012

House on the Left :: Banquette Reveal


Today I am super excited to show you our little DIY banquette. You may remember me showing a rather ugly table awhile back that we had bought as a set at Goodwill for less than $30. We already owned a great, large, solid wood dining table that I LOVED. The problem? In our new house, this beauty just took up way to much space, and it's rectangular shape did not help it fit in our kitchenette area (we do have a small room that in theory is our "dining room", but it's fully carpeted, something that does me no good with three kids, and kind of disconnected to the kitchen).  As you may remember, I did a post on banquette dreaming. I just KNEW that a banquette would be perfect for this space, especially since we are a very casual family to begin with.

I knew that we wanted a round, pedestal based table. The reason I insisted on the pedestal base was it would fit more chairs without being crowded. We found a few, but most were expensive considering the amount of work I would have to put into it.

We finally settled on this little number:


I loved the curves on the base, but hated the fact that it was brown and (eek) a laminate top. But money talks, and this baby came home with us.

I also found a bench that I thought would be perfect for our banquette here. The problem was, after living with it for a few weeks, Jason and I both agreed on two things: It would need additional support if we were to use it daily(our kids jump on things,etc). We really didn't want to do this because it would take away from the detail that we loved on the bottom. Also, I wanted the bench to be comfortable, and that meant we really wanted a back. So we ditched the bench idea (don't worry-I already have a new home in mind for it!). Instead, I used an idea I have seen floating around the web. By attaching several chairs together and creating one fluid seat, you can make a "bench". I never really liked this before, because it always looked (to me) so obvious that they were separate chairs. However, after pushing our chairs together, I realized their backs all met to look kind of like one solid piece.

Hmmm.

So I convinced Jason to jump on board, and we came up with our game plan.
First, we primed and painted the seats for the bench. We screwed the chairs together behind the front legs, where they connect. Jason cut down two pieces of plywood for the bench seat and we added our foam and fabric and reupholstered them. Already a ton better!!


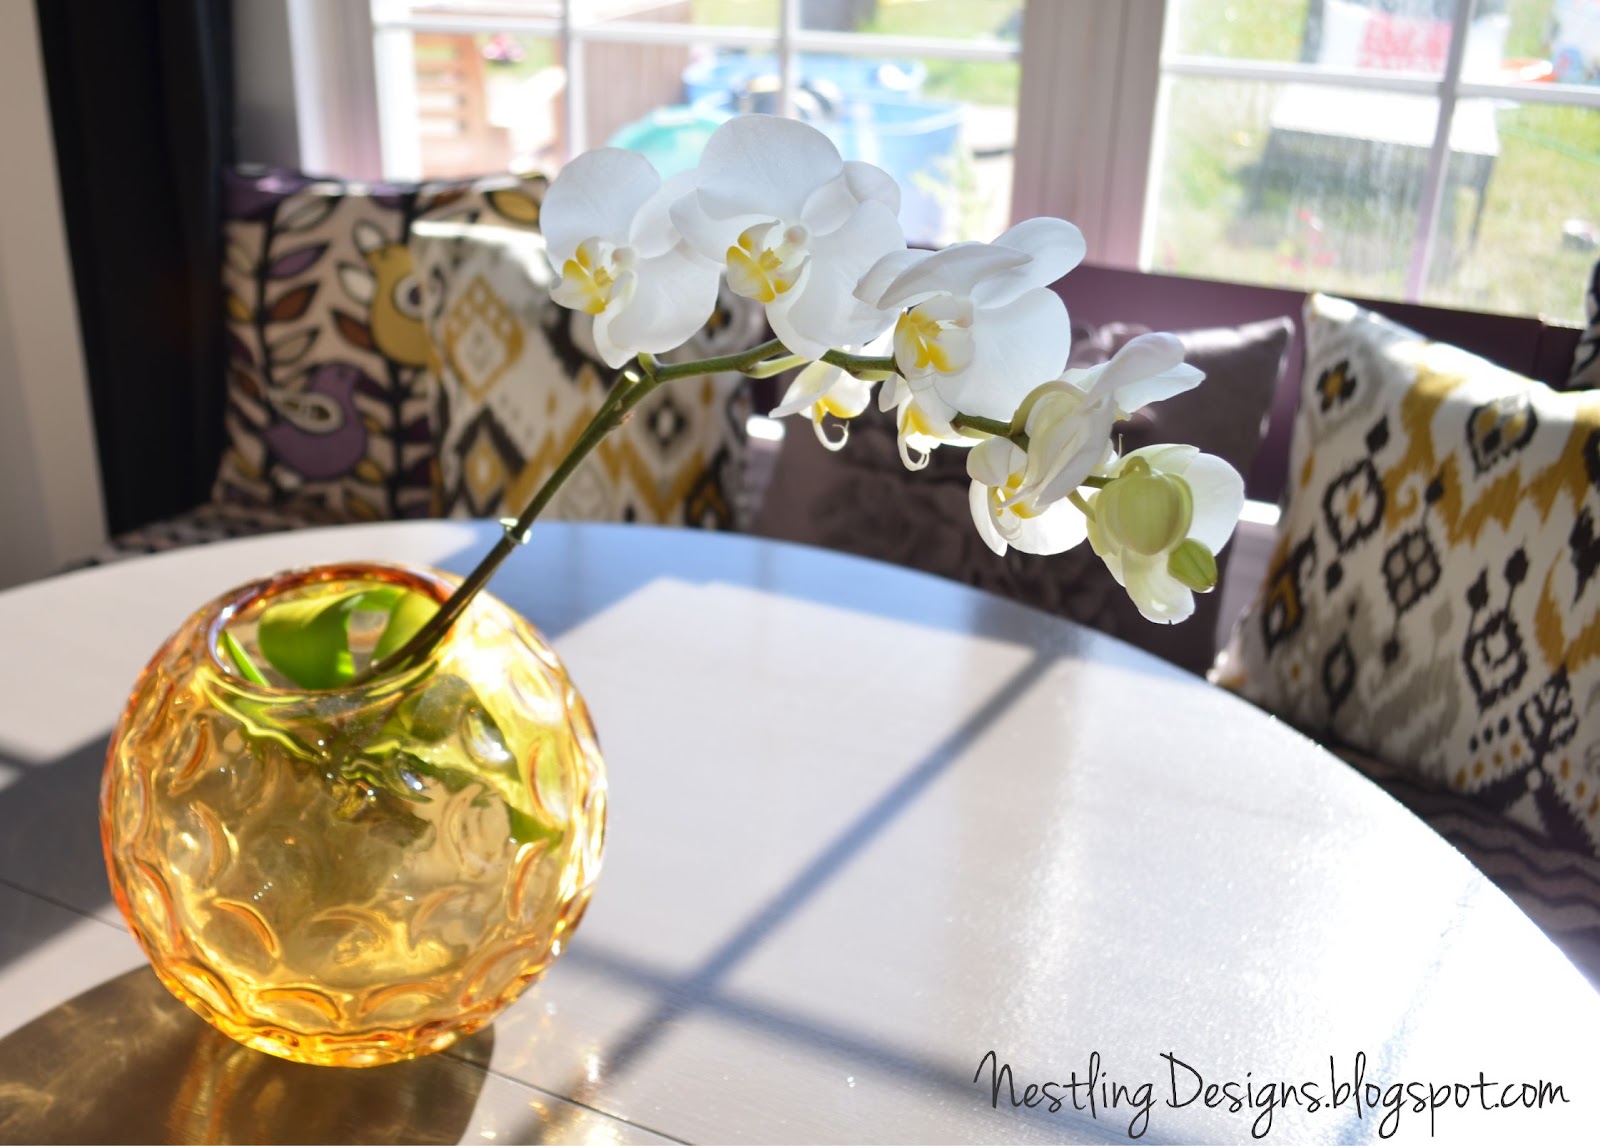
One: This close up gives you a good idea of the fabric we used for the seat. I really, really wanted to use the ikat fabric you see in the photo instead. However, I kept coming back to this chevron/zigzag one because a) it looked great with the bird print fabric already had and b) I could actually picture my kids eating pasta on it and me not having a heart attack. I honestly stood in Joann's for a hour debating this like a crazy person! Finally, the piece of mind this fabric gave me won, and I used the ikat as an accent.
Two: the bench is screwed together now, and as you can tell still looks like some chairs put together. Blah. So we decided to add black fabric that we already had lying around to the base. I chose to adhere it with Velcro- the kind you stick on one side (the bench) and sew on the other (our fabric), so that I could always take it off and wash it. We also debated about creating a wooden front of some kind....and we still might in the future :) but for now, I missed my dining table that had been MIA for three weeks while we did this project and wanted to just move forward quickly.  Also, by adding the fabric, we can now store things underneath if we wanted to.
Three: I made pillow covers for cheap pillow forms that we already had (if it doesn't creep you out, a thrift store is a great place to find "pillow forms" ---just browse their pillow isle and find one that is the size you need! super cheap). Another way to skim costs is to use the expensive fabric only on the front (like I did for the bird fabric) and a cheaper neutral in the back. I thought about it after I did it, and the only bad thing about this is that if the kids spill anything on them, I can't just turn them around :) You can also see how, with our chairs, the backs meet up perfectly.

Next, we primed and painted and waited and waited for our dining room table to dry. We used a Benjamin Moore paint, in a dark gray, and it came out beautiful.


Look at the shine! And we only used semi gloss. The ugly chairs that came with the table we painted in a color dip method, which you can see here. 

I got a beautiful chevron rug at HomeGoods


Ready to see everything put together??


The print on the right, was a great find on one of our Goodwill trips for $1. I love how the colors go perfectly with our room.


We love this area! It's perfect for our space.

Here's a little reminder of the journey this baby went on:

what do you think??
xo,
Rachel


Linking Up.....

Tuesday, June 19, 2012

Simple Birthday Parties & Gift Wrapping

Although I love a good party {clearly, since I started a whole blog to showcase that love!}, but it's always good to sit back and enjoy a nice, simple party once in a while.

Where all you need is a good location.....


.....Some lovely entertainment to keep the kids busy.....


....and some good company, of course :)


Everytime I am in the middle of party planning craziness, I always wonder if maybe I overdo it a bit. For us, and our family, parties have turned into a big deal. Jason and I have both agreed that we love doing this for them, because it's the one time a year that it's all about them {and only them}. The one time a year that they don't have to share all the attention.

In the end, a party is party, and we had a blast.

I did want to share a peek at the gift that we got for the birthday boy. To me, the packaging is practically as important as the content :)

For this present, everything I used was leftover from Jameson's party - fabric for wrapping paper, gift tag made from the steel contact paper I used on the backdrop, ribbon, and lolipop. The letters are just scrapbook stickers that I have a ton of.


Hope you are having an inspiring day! Tomorrow I am doing the banquette reveal for the House on the Left series. I can't wait to show you!


xo,
Rachel


Monday, June 18, 2012

Design Inspiration

Hello! I hope everyone is having a great week. We have got a very exciting day ahead of us full of story times at a local place and tree house-playing fun.

Today I wanted to share a with you a little nook I stumbled upon in a local mall this past week. The area was sponsored by the children's store Land of Nod, and definitely serves as a reminder that inspiration for design is all around us.


Especially in nurseries and kid's rooms it is always important to think about dressing you ceiling a little bit. I'm considering doing a lantern installation of some sort in our family room.


The Giraffe decal reminded me of this tutorial I have seen in the past on how to attach fabric to the walls using starch. The possibilities of what you could cut out are endless.


This pillow really makes me want to create my own DIY pillow with a cool stencil and some fabric paint.

And these felt garlands make great decorations for parties or to hang in a room....another great way to dress up the ceiling!

Hope you find a little inspiration in these as well :)

xo,
Rachel