Tuesday, February 21, 2012

Care Bear Party Plan of Action!

One of the things I am really excited to do with this blog is to show how I come up with my parties and design ideas. I really want to show the whole process from start to finish.

About 2 months before a party I start searching the Internet for ideas. Google Images has become my best friend. Pinterest is amazing, not only to sort all the great things I find in my searches, but to also FIND cool things that I might not have ordinarily come across myself. I usually also create a digital image board that helps me to feel inspired and remind me of what I want the space or party to be. Sometimes I am easily sidetracked by pretty objects :)

From there, I typically come up with a mental plan of what I want the party to look like. About 4-6 weeks out, I usually draw up a sketch of all my ideas. I LOVE to do this because it helps organize my thoughts. As you'll see soon, my sketches are pretty rough. Sometimes, when I have more time (or motivation!) I spend more time into making them nice. I love doing this for my clients as well (although, I always make sure theirs looks nicer than the ones I throw together for my parties lol) because I really think it helps them visualize what the concept is going to look like.

The other reason I always do this is because it allows me to see what things I am going to need to buy and/or make. SO important when sticking to a budget. (although, I am sure if my boyfriend read this he would laugh, because I almost always go over ours :)  ) Plus, by drawing out the layout for the dessert table, craft station, etc I can see where there are empty spaces are that will need to be filled.

I typically sketch in pencil and then go over it marker. As I draw each item I am sure to add them to my 'make' list or 'buy' list. For this party, I did a quick sketch one day at the library and came home to finish it. I was really excited to color it in today, but realized it ended up looking a little boring on paper since most of what I am doing are WHITE clouds, so there really wasn't much to render today :) But I hope you will get the idea of what it will look like.
The dessert table:


Remember how I said sketching everything made me realize where there were empty spots, etc? Well, this is a great example, because after finishing it, I noticed that the left side is just way out of scale with the right. I figure I have two options: flip some things around, or put the items on the right on covered boxes to bring them to the same height. I think I am going to do the second option: always a great way to get creative with boxes!! Just add that to my 'make' list! lol
The ice cream bar and the table where they will be eating lunch:


By this point I realize I wasn't getting much out of my rendering, so I just left the last page colorless. It's my idea for the entrance (that part was cut off, so I guess it will just have to be a surprise!) and the gift table:


The little guy was busy coloring his picture while I did mine :)


Looking at all the photos from here I noticed that my rainbow ribbon backdrop almost looks like streamers...which makes me question if I should try to do the ruffled/sewn streamer thing I have seen floating around Pinterest.... hmm. What do you think??

I hoped you enjoyed the little sneak peek into my planning mind :) I hope to do a better job at explaining the whole process after the party....when we have already moved :)

Rachel


Monday, February 20, 2012

Care Bear Photo Shoot

Amist tons of packing, I managed to stage and take a few pictures of our little girl to go with her invitation (as well as actually come up with a plan for her party-to be revealed tomorrow!!)
She LOVED the excuse to get back into her Halloween costume and pose with all her fellow Care Bears (or, as she says: "I'm the mama bear, and they are the babies!"). The photos are not exactly my best work, since I was rushed and trying to work with what non existent sunlight we have up here right now. But they get the job done :)


As you can tell, she is completely deprived, and has no Care Bears lol. Some aren't even in the shot, and I swear we are missing a few that I couldn't find around the house.


By this point, she gave up posing, and began to just "pet" the bears :)


....and this little green guy is the one that started all this madness :) Found by our little girl one day at a thrift shop, I wasn't even going to let her have him (used stuffed animals kinda freak me out), but she put up such a fight, that we gave in. And I am happy we did! It was love at first sight.


...even the little guy got into it and played with the monkey one that my mom got for him since we call him monkey.

All said and done, I took about 58 pictures. And my favorite was the 2nd one that we took (the first one on here). Isn't that just the way it always works? Ha!

One step closer in Care Bear craziness; I can't wait to share all my plans with you tomorrow!

Rachel


Friday, February 17, 2012

Care Bear Madness has Begun!

Let the madness begin!
A few days ago I shared some of my ideas for our daughter's Care Bear party. While I have been busy behind the scenes designing all the details, (which, btw, are so cute I can't wait to add them on to Etsy when I am all done!), items for her party have begun to slowly roll in. Because, really, when you are 6 days away from moving and trying to pack up everything you own, who doesn't go out and just buy more stuff?? PRIORITIES, people! Ha!

I have to admit, this is my absolute favorite part of the party planning, where you start to gather all the little details you are going to use. Wait, I take that back. My ABSOLUTE favorite part is setting up and seeing all my ideas FINALLY come to fruition. But there is nothing that makes me giddier than seeing a box full of all the little goodies I have been collecting. Sometimes, I like to just go through everything "one more time" just to see how great everything looks together. Anybody else that crazy??

Every party that I plan I swear is my favorite. And it's true....at least until the next one :) But I swear, this one really pulls a string on my heart. I can still remember watching the CareBear movie when I was little everyday. I kind of feel like I am planning the party of my dreams for the five-year-old in me!

And really, how can you not love something so fun and colorful?

The straws were the first to arrive, and I swear they look better in person than they did online!


...and then I found these adorable little glasses from Goodwill that were only 49cents! They will be absolutely perfect for the little "shots" of milk we are having (just imagine these little babies with a rainbow sprinkle rim)


And then our cloud cookie cutter came. Does anyone else see a bee shape?? I know once the cookies are frosted they will totally look like clouds, and I kinda like knowing that I can reuse this cutter to make bees as well. Double duty!


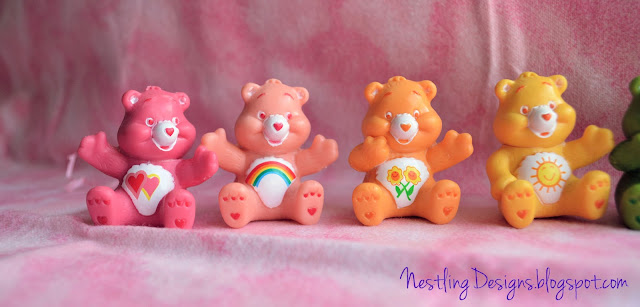
...and finally the bears came!! We (and by we, I mean our little princess) decided on little toy cupcake toppers. One in each color!! Surprisingly, she chose the cupcake route instead of a cake. For once, she chose something easier for us!


Insert excited squeal!! How can these little guys not just cheer you up??

I have finished designing the invitation on the computer, but just need to take a picture of our birthday girl dressed up in her CareBear costume from Halloween to complete them! I HOPE to actually do this today, although I must admit, I am feeling rather unmotivated. Maybe a sneak preview tomorrow???

'Till then, it's off to packing I go! Ugh :)

I hope you all have a wonderful weekend!!

Rachel

***The straws were ordered from the link I gave in my prior post; all other items were purchased either from Goodwill or Ebay***


Wednesday, February 15, 2012

Winter Storage

Although we haven't had much of winter up here, it has not eliminated the fact that (once again) I needed to figure out a way to store all our MANY gloves, hats, scarves and shoes. Ugh. This has always been one of the hardest things for me to organize because we only use these items a portion of the year.

About two years ago we got a small shoe organizer from IKEA to try to get our shoe problems under control. The problem is that our entry (and by entry, I mean 4sq feet of space you have when you enter our house) is really small. As in nonexistent. So this shoe cubby of ours barely puts a dent into our problem. That, and the fact that our children seem to be physically incapable of actually putting their shoes inside of it :)

So, we decided to nix the shoes and put in all their little winter accessories. One drawer for each child. Easy peasy, right?? Pshh. that didn't work. No one remembered what drawer was theirs, and when they needed something, we ended up searching through the whole thing....just to find it in the bottom of someone else's drawer. ::: sigh :::

Finally, I just cleared it out completely. I dedicated each drawer to one item instead of one child. So now we have a glove drawer, a hat drawer, and a scarf drawer. I made labels and printed them up, putting them on each drawer with clear contact paper. This not only protects the labels but allows me to easily pull them off in a few months when we no longer need them. I don't know why, but this system has been working really well for us the past couple of months! (enter me, in astonishment)


I used simple images so the kids could remember which drawer was which.

It's been working out great, and can work for you too! Just download HERE.

Hope you are having a great winter as well!

Rachel


Tuesday, February 14, 2012

Lover"s Day

I cannot believe it is Valentine's Day.

Um, where did the time go?
I have been planning out everything (like I do for all our holiday's) for awhile.

I mean, you have seen the robot craziness that has surrounded our house.

And there I was last night (with, apparently, half of our town) searching the racks of Target for items to throw into our kid's baskets. Because, at least I (barely) managed to do that. Luckily for me, they are too young to notice my lack of effort :) Our big guy was too excited about everything that was going on for school (at least some people managed to have their stuff together! ha!). But you know what he said to me as I tucked him in tonight? "I think we had the best Valentine's Day out of anyone, because you've been planning it for awhile!"

Well, awwww. I have somehow managed to completely fool my children into believing that their mommy is amazing :)

Life (as always) has been a little crazy here. I have been scrambling around trying to finish up old projects, starting new ones (do I hear a Care Bear chorus in the background??),  and doing lots of packing wandering around the house, trying to see what I can actually pack and not need in the next 2 weeks.

But, I am not going to lie. I still kind of looked at my Valentine's Day board on Pinterest with a little regret. There is always next year, right? (No 2012 joke needed, please! lol)

ahhhh, what could have been....


I totally had plans for cut out letters. Even a little bit of gold, my newest obsession.

I had several plans for new garland. I LOVE the doiley garland (#1), but had planed on doing something like 2 & 4.


I loved the purple and gold combo.


Valentine's Day bingo


I loved the cupcakes, and they looked super easy to make.


....till next year :)

Rachel


Friday, February 10, 2012

build your own candy braclets

Last year for our daughter's 3rd birthday, we had a My Little Pony party. Not wanting to be too "themey", I stuck with the rainbow concept. (now, cut to this year's party, and I am having a hard time trying to one-up my rainbow party!ha!)
Cruising the web, I had come across this adorable party where the children were given their own candy to make necklaces, bracelets, etc.

 I thought the idea was adorable, (and could be tailored to fit my color scheme perfectly) but was already knee deep in ideas. So I made a mental note to revisit later. I am still debating about whether I would like to do something like this, or have the children make actual jewelry for our daughter's party, but in the mean time, I figured this concept could be scaled down and turned into a wonderful craft to entertain the kids. About a month ago we started what we call "basket time", where everyday I place an activity (craft, game, etc) as a surprise for the kids to do.
I'm not going to lie: I mostly came up with this idea to try to get the kids to leave me alone long enough to enjoy a cup of coffee :)
The kids LOVE it, and I try to make the activities fun and interesting.
One morning, I realize I didn't have anything planned (and really, at 7am, I had no desire to plan anything!), so I threw some Fruit Loops (a cereal we normally don't carry in our house, so this was a real treat!) in a bowl, and set out some yarn.


Each child got there own bowl and peice of yarn.


Our daughter basically strung on a few and just ate the rest. I think she was worried that she would have to give me the necklace once she was done :)


The little guy gave up string after about one or two and just went to town eating them.


But our big guy strung them on until the last one was laced.


I tied it into a knot for him and voila! Candy bracelets! I'd like to say it's a healthier version, but I don't know if I really buy into all that! But it was cheap, easy, and would be great to make with cheerios or other cereals. I once read that someone made them to bring on road trips, and I think that idea is just great.


I know the big guy liked his :)


**Please note, that these pictures were taken (although early in the morning) after an art project, hence the dirty children I have featured in every photo!** I honestly contemplated not even placing any photos on here :) But, I guess this just shows our little bit of reality!
What kind of activities have you used to entertain your children?

Rachel


Wednesday, February 8, 2012

Care Bears Everywhere

Hello!

Admist all the robot-making and packing and all other normal "mom stuff", I have begun planning for the Care Bear craziness that is sure to embark on us soon.

Our little girl is turning 4.

(and yes, that's hot chocolate all over her shirt. Because that, my friends, is our little girl in a nutshell!)


Literally, the day after her 3rd birthday party ( My Little Pony, if you wondering!), she has been gearing up for the big 0-4. As in Care Bear party, big girl style. We have been talking about it for so long, I can't believe that it's actually here.....and that we are in the middle of a huge (pretty last-minute) move.....and that I have done NOTHING for her party. Zip. Zilch. Nada. Her party is in less than a month. Our move is in 2 weeks. This is go time, and I am still just coming up with a plan :)

Here is a sneak peak at some of the beauties I have been coming up with around the web and pinning to Pinterest:


Care Bears....I am talking everywhere!! Lord knows we own enough of them!


I love these cupcakes! The white frosting is very cloud like (a major part in my theme!), and the hearts add that perfect, simple element.


Rainbow Polka Dot Straws. Can you believe these babies are only $4? Perfection.


Rainbow wooden spoons! I am in love. So in love, I am seriously debating doing an ice cream bar JUST so I can buy these :)


Sunshine cookies! Thinking about doing a mix of sunshine and cloud cookies to give away as favors. I even love the clever packaging in the clear box- I would wrap mine in a rainbow ribbon of course! There are even step by step directions on how to make the cookies on her blog. THESE look amazing, I am afraid mine will come out looking a little....special :)

I have to admit that even though I have a lot going on right now, just gathering all these ideas has really inspired me to start planning for one aaaamazing party for an amazing little girl :)

I hope it inspired you as well.

Rachel


Tuesday, February 7, 2012

Robot Inspired Vases

I am beginning to feel like all I talk about are robots :)

That is how it is at our house. Whatever party we have coming up seems to be the latest obsession.
Case in point: I woke up to our oldest son chasing our daughter with a diaper box on his head, claiming he was a robot. Is it bad that even though I was only half awake, I still thought to myself, "if we put some slinkies over his arms, that could actually be a cute diy costume" ?? Hmmm.

I digress.

My current obsession, to go with all things robot, has been slinkies. I mean, really, how fun are these things?

Valentine's Day and flowers pretty much go hand in hand, so I began thinking of ways to make a vase out of slinkies. And then I just stuck one into a vase I already had from the dollar store, and there you go: perfection. :)


I love how it's a subtle decoration, but really adds that clean, modern look that I tend to strive for.


::::sigh::::

Sometimes it's really the smallest details that make you the happiest, isn't it?


Rachel

Sunday, February 5, 2012

diy Robot Wreath

I firmly believe that when you throw a party (especially for children), that decorating where your guests enter is just as important as the decorations for the party itself, because you want to set the tone the moment they arrive. So what better way to welcome our guests to a robot party, than a a custum wreath? Wreaths are such a versatile way to introduce your theme. We have wreaths for holidays, so why not parties?

I love LOVE the idea of using slinkies in our robot party. They remind me of springs, an object I am sure robots would be made out! Not to mention, they are CHEAP. So this wreath was inspired by that :)


First, I gathered up all my supplies:


 I made my wreath base out of foam that we have lying around. You could also buy one from the store. First, you will need to cut out the robot and hearts from the sheet of paper. Trace a circle the size of the wreath that you want onto the foam. I made mine about 12" wide & about 2" thick.


Next, glue the robot and hearts onto the foam. you could always use posterboard as well, but I think the foam is much sturdier. Using an exacto knife, cut out your objects, including the wreath.


I first attached the slinkies to each outher, and then to the foam using hot glue. I ended up using 3 slinkies for this wreath, because I didn't want it be too stretched out that it wouldn't look springy. I started by "corners" and then worked my way around. After, I attached my robot head onto the back. I had an extra "antenna" leftover from the headband I used for a previous project, so I then attached that to my robot as well. You can always make one out of pipe cleaners and construction paper, too.


Finally, glue on any accessories, such as the digital hearts. I also used nuts and bolts I found at the dollar store. Wrap ribbon around top and tie into bow.

Over all, I am pleased with how it turned out. I think in hindsight, I would have made my wreath larger.

Click Here to upload a free pdf file of the robot and hearts, so you can make your own wreath! You could always eliminate the hearts and make it a more birthday-like wreath. Add a welcome sign or the child's age to really personalize it!

Rachel